Replacing last year's lunar calendar with a lovely 2023 version, and feeling a little bit of ‘single-use’ guilt? Here's a little rainy day project for you...


I've tried to make it as straight forward as possible with little hacks and suggestions for alternative tools, but if you want to keep it *extra* simple, just skip the hole punching and sewing and use an elastic band.
I've also created an insert which you can download and print at home as the first page of your journal. It features dates (GMT) of all the upcoming new and full moons in 2023.
Things you'll need:
- Last year's A4 moon calendar (or other A4 card)
- 2023 moon phases insert page, printed on A4 paper
- 12-16 sheets of A4 paper - I'm using cut down scraps from my paper stash, including some darker colours (because I love to write in white ink!)
- Scissors
- Paper creaser (alternatively try using an empty biro, or a pair of scissors that aren't too sharp)
- Strong thread (waxed linen or cotton thread, or embroidery thread)
- Needle
- Paper punch or awl (alternatively you can try using a pin)
- Metal ruler
- Craft knife
- A cutting mat (or several sheets of thick cardboard)
- Bulldog clips (or similar)
Instructions
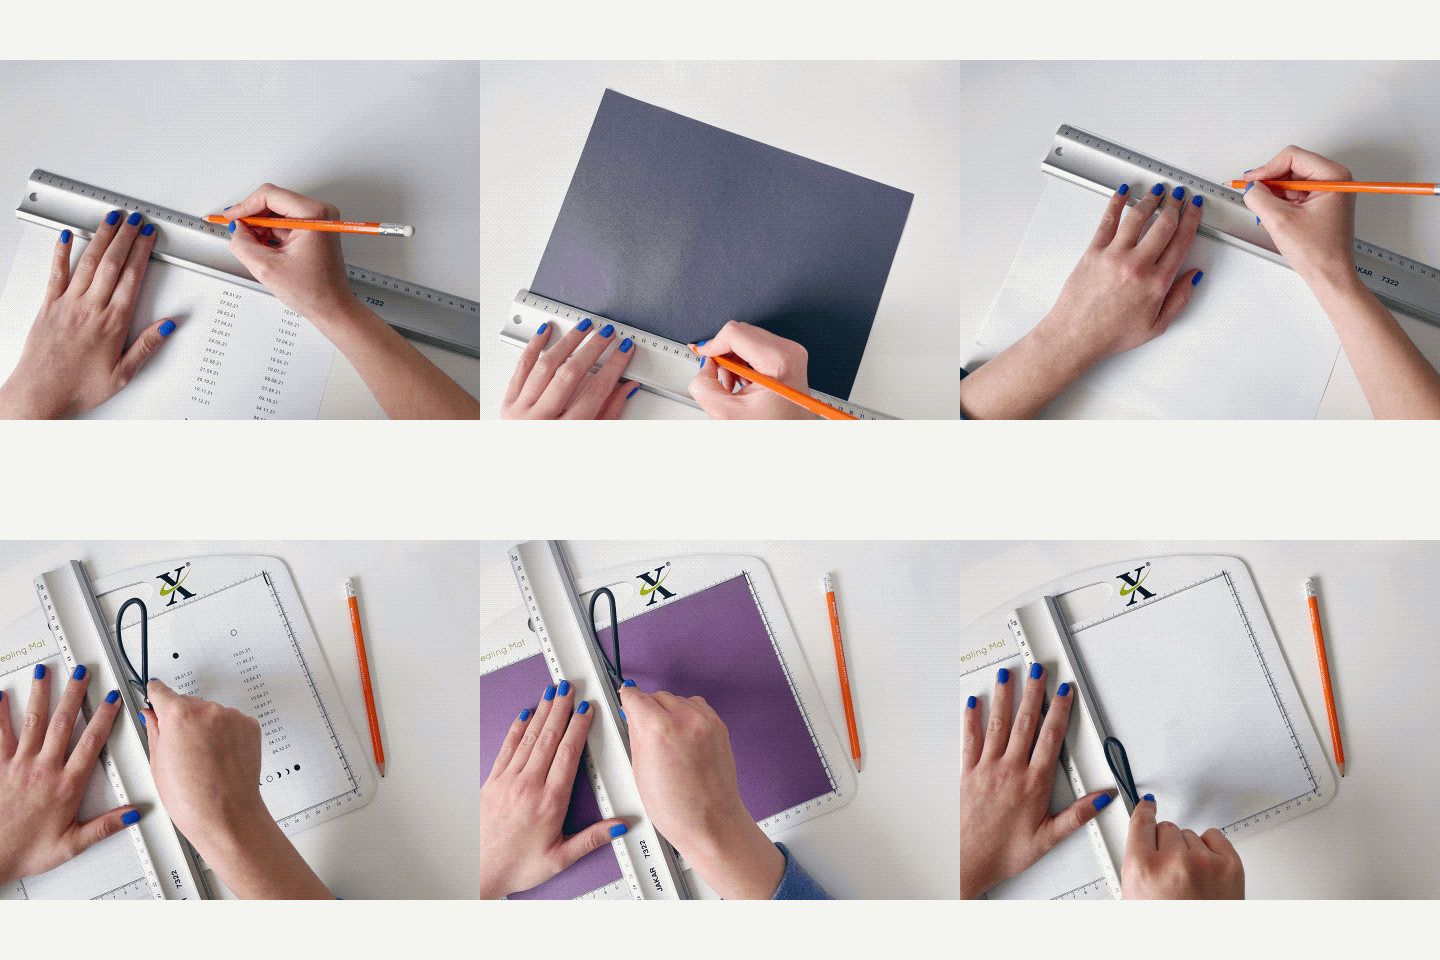
- Score the moon calendar print (or other A4 card) right down the centre and on the right side, so that it will fold nicely into an A5 cover. The halfway point is about 148mm, so measure and mark this and then use your paper creaser, empty biro, or scissors to place even pressure along the centre of the card to create an indent. This will make for a nice clean fold.

- Repeat this process on each of your A4 sheets of paper (including the moon phases sheet). Be careful not to apply too much pressure!

- Stack the sheets of paper up so that the score lines match, with the moon phases sheet on the top, and the cover sheet on top of that. Use bulldog clips to keep everything in place at the shorter ends.

- Next, measure half way down the score line (105mm) and use your paper punch, awl, or pin to mark a hole.
- Now measure 5cm away from that central point on the score line, once on each side, and mark these points with your punch/awl/pin.
- Now that these points are marked, focus on creating three clean holes using your punch/awl/pin. Using several sheets of cardboard underneath with help you to do this. If using an awl or a pin, 'waggle' it around carefully to create a 1-2mm hole.

- Thread your needle (depending what thread you are using, you might find that you don't need a needle) and bring the thread from the central hole inside the book, to the outside, leaving approx. 5cm trail inside. Hold on to that trail of thread with your finger so that you don't accidentally pull it right through.
- Next, thread through the top outside hole to the inside, and pull through.
- Thread from the lowest inside hole, to the outside.
- Finally, thread back through the central hole from the outside.

- Open the book, cut the thread so that you have another trail of thread (approx 5cm), and tie the two thread trails in a knot.
- Fold the book, and press it for a few hours, or overnight - you can use a pile of books for this, or other heavy, flat object!
- Finally, use your metal ruler and craft knife to trim any excess paper.

- Optional - use waxed thread, ribbon, or similar to create a tie closure for your journal.
Voila. Happy moon journalling, lovelies!
Fancy sharing? I'd love to see what you've made! Tag me in your Instagram pics @lottie.suki
